こんにちは ebi です。
先日、Hotwire のリリースがありましたが、 Hotwire 以前から存在する Rails ベースで SPA 風のサイトを実現するのに適した StimulusReflex について、公式サイトの導入などの触りをやってみたので記録として残しておきます。
まだ全容が分かってないなりにメモがてら色々書いているため、誤った表現、コメントが含まれるであろう旨は予めご容赦ください。

はじめに
Stimulus は Ruby on Rails の生みの親である DHH 氏でお馴染みの Basecamp 社製の JavaScript フレームワークで、後述する StimulusReflex のベースになっていることもあって Rails ウォッチなどでも度々取り上げられています。
Stimulus は React などのように、ページやパーツ全体の DOM 構造を JS 内で定義して空のページからスタートするのではなく、あくまでサーバ上から送られる HTML をベースにする方針で、何か動的な制御を加えたい部分に関する処理の定義だけを付け足すのに適しています。
参考:
- SPAじゃないプロジェクトのための控えめなJavaScriptフレームワーク「Stimulus」 - yuhei blog
- Stimulus – 受託Web屋に「ちょうどいい」JavaScriptフレームワーク
個人的にはこうした用途に関しては Stimulus を使うよりも Vue.js でもいいのかな、とまだ思っていたりはします。
ただ、こと Rails においての Vue.js 、 Stimulus との相性とかは全く把握しきれていないので、 Hotwire が打ち出すように Turbolinks などとセットで使うにあたっては Stimulus を用いた方が都合が良かったりするのかもしれません(この辺りは是非もっと僕のような一平凡なデベロッパーにも伝わる形で、有識者の方に知見を発信していただきたいところ)。
StimulusReflex は、この Stimulus と CableReady をベースに Rails に備わる ActionCable を利用した WebSocket 接続を活用して、各ユーザからの更新が即時反映されるようなリアクティブなユーザ体験を持たせる機能導入に特化したライブラリです。
10分で Twitter クローンを作成するデモ映像がありますので、まだ見ていない方はこれで雰囲気確認してみてください。
Hotwire との違いについて
この記事を書いてみたりするまで僕自身もあまり理解しきれていなかったのですが、 hotwire-rails 中に StimulusReflex は含まれておらず、 Turbo 中の Turbo Streams の概念が WebSocket との繋ぎこみを担うようなものになっているようです
( Turbo 自体は Rails/ActionCable に依存しないコンセプトのはずであるため、ここでは敢えて hotwire-rails と表記しています)。
要するに Hotwire と StimulusReflex は似たようなことを実現するツールのようですが全く別物なんですね。
(冷静に考えてみれば、 StimulusReflex は StimulusReflex で独自に開発されたものですもんね……)
いわゆる Rails Way を意識するなら Hotwire の方がまずは抑えるべき技術かもしれません
CableReady のドキュメント中には、 Hotwire のことをライバルや代替ツールとして認めつつも CableReady は Turbo Streams からのアップグレードパスとして機能するだろう 、のような趣旨の内容が含まれています。
忙しい人向け
--webpack=stimulus 付きで rails new する。
あとは公式に書いてある通り、
bundle add stimulus_reflex
rails stimulus_reflex:install
で StimulusReflex をセットアップする。
rails g stimulus_reflex user
でベースになる app/javascript/controllers/application_controller.js と app/reflexes/application_reflex.rb の準備ができ、
app/javascript/controllers/user_controller.js と app/reflexes/user_reflex.rb みたいな取り上げたいターゲット向けの処理を定義するファイルが新規追加される
事前準備
さて、ここから今回の記事の本題に入っていきます。
任意の Rails 環境を用意して rails new します。 ActionCable を利用するうえで Redis の導入も必須なのでそこだけ注意してください。
僕の場合は適当に EvilMartins の docker-compose テンプレートを Ruby 3.0 なんかに対応させつつ、 rails new . -f -d postgresql -M --skip-sprockets --webpack=stimulus から始めました。
ソースコードを GitHub にプッシュしているので詳しく確認したい方はそこからどうぞ。
ちなみに今回は Windows ホストのファイルシステム内じゃなくて、 WSL2 上の Ubuntu 20.04 環境内で Docker for Windows を動かしているのだけど、コンテナ内で rails new とかすると軒並み root の持ち物になってしまうので、仕方なく rails new 直後に chown -R 1000:1000 . も実行して Ubuntu のホストユーザの権限に寄せています。
この辺は Windows 側にファイル置いてた方が何も考えなくて済むのだけど、代償にもっとエグイ問題踏んだりすることも多いので Rails 開発をするにあたっては Ubuntu 側にファイル置いておくことにします。なんとかならないものか 🤔
何はともあれ rails new 直後の起動画面が出るところまで準備します。
ここまでは StimulusReflex とはまるで関係ないので、よく分からない人は rails new に重点置いた他の記事からチャレンジしてみてください。
StimulusReflex を追加する - Setup
StimulusReflex 公式サイトのドキュメントに沿って作業、動作確認してみます。
bundle add stimulus_reflex
rails stimulus_reflex:install
を実行します。
途中 Trying to register Bundler::GemfileError for status code 4 but Bundler::GemfileError is already registered 出ましたが、最終的に
StimulusReflex and CableReady have been successfully installed!
Go to https://docs.stimulusreflex.com/quickstart if you need help getting started.
の表記が出ていたので無視します。
Gemfile の差分見た時に redis gem がコメントアウトされたままなのに気付いたので、 redis gem も install させます。
Quick Start - Hello, Reflex World!
StimulusReflex の利用の仕方には2パターンあるそうです。
data-reflex 属性を使ってコードなしに reflex を宣言するか、 Stimulus コントローラの中で stimulate メソッドを呼び出すか。
現時点では何を言っているのか全く分からないのでとにかくサンプルコードを動かしてみます。
下準備
まず下準備で適当な controller と view を準備します
ebi@LAPTOP-5KDTING8:~/stimulus-tutorial$ docker-compose run --rm rails rails g controller Pages index
Creating stimulus-tutorial_rails_run ... done
Running via Spring preloader in process 20
      create  app/controllers/pages_controller.rb
       route  get 'pages/index'
      invoke  erb
      create    app/views/pages
      create    app/views/pages/index.html.erb
      invoke  test_unit
      create    test/controllers/pages_controller_test.rb
      invoke  helper
      create    app/helpers/pages_helper.rb
      invoke    test_unit
      invoke  assets
      invoke    css
      create      app/assets/stylesheets/pages.css
routes.rb を編集して root を今作った pages/index.html.erb と対応させます
Rails.application.routes.draw do
  root 'pages#index'
  # For details on the DSL available within this file, see https://guides.rubyonrails.org/routing.html
end
あれー、なんか滅茶エラー出てる 😅
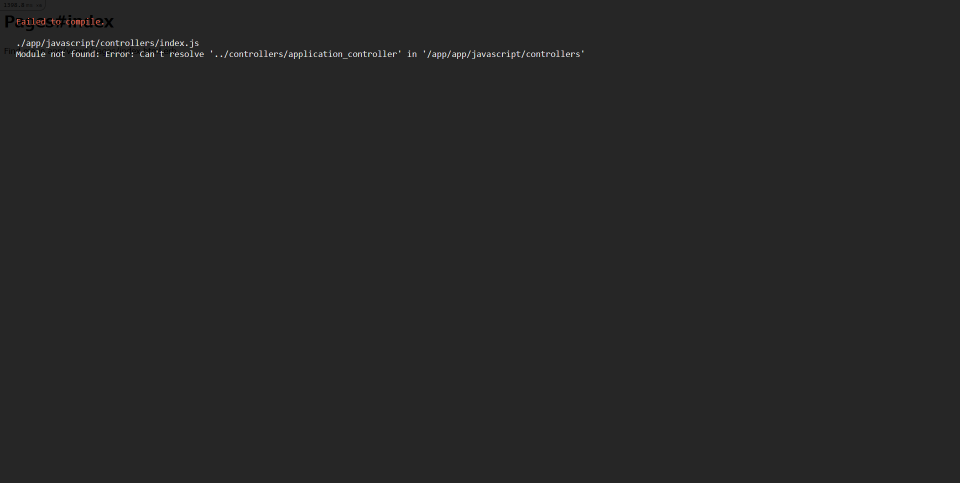
よく分からないけど、確かに app/javascript/controllers/application_controller.js なんて用意されてないのでとりあえず app/javascript/controllers/index.js 上の該当の import 処理はコメントアウトしておきます
// Load all the controllers within this directory and all subdirectories.
// Controller files must be named *_controller.js.

import { Application } from "stimulus"
import { definitionsFromContext } from "stimulus/webpack-helpers"
import StimulusReflex from 'stimulus_reflex'
import consumer from '../channels/consumer'
// import controller from '../controllers/application_controller'

const application = Application.start()
const context = require.context("controllers", true, /_controller\.js$/)
application.load(definitionsFromContext(context))
StimulusReflex.initialize(application, { consumer, controller, isolate: true })
StimulusReflex.debug = process.env.RAILS_ENV === 'development'
はい、これで新規画面の追加ができました。

Trigger Reflex actions with data-reflex attributes
ここからはまず一つ目のサンプルコード例を実際に動かしてみます。
app/views/pages/index.html.erb に追記
<h1>Pages#index</h1>
<p>Find me in app/views/pages/index.html.erb</p>

<a href="#"
  data-reflex="click->CounterReflex#increment"
  data-step="1"
  data-count="<%= @count.to_i %>"
>Increment <%= @count.to_i %></a>
app/reflexes/counter_reflex.rb のファイルを新規作成
class CounterReflex < ApplicationReflex
  def increment
    @count = element.dataset[:count].to_i + element.dataset[:step].to_i
  end
end
うーん、書くだけ書いてみたけどそれらしく動いていない。
まず先ほど見て見ぬふりをした application_controller.js はやはりあった方が良い気がしてきました。と言うか StimulusReflex.initialize(application, { consumer, controller, isolate: true }) で使おうとしているように見える。
そこで、先にUseful Patternsの方に飛んじゃうんですが、普段から馴染みのある Rails の MVC のコントローラ同様にベースとしての application_controler.js を用意するみたいな Application controller パターンの説明が書いてあるところを見つけたのでこれを適用しておきます。
app/javascript/controllers/application_controller.js を新規作成。先ほどの index.js 中のコメントアウトも解除しておきます。
ちなみにしれっとここで適用した connect メソッドの定義がないと StimulusReflex は動かないっぽい。
import { Controller } from 'stimulus'
import StimulusReflex from 'stimulus_reflex'

export default class extends Controller {
  connect () {
    StimulusReflex.register(this)
  }

  sayHi () {
    console.log('Hello from the Application controller.')
  }
}
しかし、まだ上手く動きません。
落ち着いて docker-compose のログを見てみるとこんなログが
rails_1      | Reflex CounterReflex#increment failed: uninitialized constant ApplicationReflex
rails_1      | Did you mean?  ApplicationHelper
rails_1      |                ApplicationRecord
rails_1      |                ApplicationCable
あーね、 ApplicationReflex もベースの定義ファイル必要なのね。確かに落ち着いてコード見返すとそう言う記述になってますね 🙄
と言うことで app/reflexes/application_reflex.rb のファイルを新規作成(これも Useful Pattern ページの内容を参考)
class ApplicationReflex < StimulusReflex::Reflex
end
晴れてカウンターが動作するようになりました。
無事動いたので自分なりのまとめ。
- これはどちらかと言うと Stimulus に関する話のはずですが、 javascript/controllers 配下に *_controller.js のファイルを切って制御処理を定義していくことになります。
- 更にその Stimulus コントローラのベースとして application_controller.js を切ります。
どうやら StimulusReflex を呼び出すdata-reflexや後述する stimulate メソッドを利用するにあたって、StimulusReflex.register(this)の宣言が必須で、
それを Stimulus が DOM と接続したタイミング( Stimulus のライフサイクルをご覧ください )に行う処理connectメソッド中に登録していて、この application_controller.js に定義しておくことが推奨されてそうです。 - Stimulus では HTML 標準構文の data 属性 を利用して、引数や設定なんかの宣言を行っていきます。
data-reflexが StimulusReflex の呼び出しに関連する属性です。[DOM-event]->[ReflexClass]#[action]の構文で制御指定をします。
上記の例ではclick->CounterReflex#incrementと書かれていたので、clickイベントをトリガーに CounterReflex クラスのincrementアクションを呼び出すって指示を「Increment」の文字と対応した a タグに指定しています。incrementアクションでは@count = element.dataset[:count].to_i + element.dataset[:step].to_iの定義があります。
element.dataset[:count],element.dataset[:step]はそれぞれこの CounterReflex クラスを呼び出した a タグに定義されているdata-count="<%= @count.to_i %>",data-step="1"のdata属性と対応しています。
data-step の定義が一クリックごとにいくつの値を足すかの定数指定、 data-count ( @count )がカウント数を保持する変数になります。- 初期表示時には
@countは未定義ですが、to_iされているので 0 が表示されているって感じですね
Trigger Reflex actions inside Stimulus controllers
さて今度は Stimulus コントローラから StimulusReflex の利用宣言をしてみます。
先に同じ機能を作ってしまっているので、ここでは decrement するカウンターを足すことにしてみます。
app/views/pages/index.html.erb に追記
<br><a href="#"
  data-controller="counter"
  data-action="click->counter#decrement"
>Decrement <%= @count_2 %></a>
app/javascript/controllers/counter_controller.js を新規作成
import ApplicationController from './application_controller.js'

export default class extends ApplicationController {
  decrement(event) {
    event.preventDefault()
    this.stimulate('Counter#decrement', 1)
  }
}
app/reflexes/counter_reflex.rb に decrement の定義を追記
  def decrement(step = 1)
    session[:count_2] = session[:count_2].to_i - step
  end
app/controllers/pages_controller.rb にインスタンス変数 @count_2 の定義を追加
class PagesController < ApplicationController
  def index
    @count_2 = session[:count_2].to_i
  end
end
Decrement 機能はできたのですが、同時に Increment 向けの @count が初期化される動きになりました 🤔
よく分からなかったので潔く無視します。実際のところはページごと再表示扱いしているから CounterReflex#increment 中の @count = element.dataset[:count].to_i が呼び出されず @count が未定義扱いからになっているのかな?(誰か教えてください……)。
再度自分なりのまとめ
- 今回は DOM に対して直接 StimulusReflex の宣言をするのではなく、 Stimulus コントローラと対応付けたうえでコントローラ側から StimulusReflex を呼び出すような流れで定義を行いました。
data-controller="counter"で DOM と CounterController との対応付けを行っています。
data-action="click->counter#decrement"は click イベントをトリガーにして CounterController の decrement アクションを呼び出す指定になってます。- decrement アクション内では、まず
event.preventDefault()しています。この指定がないと、本来の a タグの動作である画面遷移やページ内リンクへの遷移処理が行われてしまい、変な動きになってきます。 - 次に
this.stimulate('Counter#decrement', 1)の指定で CounterReflex の decrement アクションを引数 step=1 を渡しながら実行する指示が書いてあります。この stimulate メソッドを利用するんですね。
StimulusReflex Generator
無駄に苦労させられましたが、どうやら bundle exec rails generate stimulus_reflex user を実行すれば
app/javascript/controllers/application_controller.js
app/javascript/controllers/user_controller.js
app/reflexes/application_reflex.rb
app/reflexes/user_reflex.rb
を自動生成してくれそうです
と言うオチでした。
上記を実行した時の各ファイルの中身はこんな感じになります。
app/javascript/controllers/application_controller.js
import { Controller } from 'stimulus'
import StimulusReflex from 'stimulus_reflex'

/* This is your ApplicationController.
 * All StimulusReflex controllers should inherit from this class.
 *
 * Example:
 *
 *   import ApplicationController from './application_controller'
 *
 *   export default class extends ApplicationController { ... }
 *
 * Learn more at: https://docs.stimulusreflex.com
 */
export default class extends Controller {
  connect () {
    StimulusReflex.register(this)
  }

  /* Application-wide lifecycle methods
   *
   * Use these methods to handle lifecycle concerns for the entire application.
   * Using the lifecycle is optional, so feel free to delete these stubs if you don't need them.
   *
   * Arguments:
   *
   *   element - the element that triggered the reflex
   *             may be different than the Stimulus controller's this.element
   *
   *   reflex - the name of the reflex e.g. "Example#demo"
   *
   *   error/noop - the error message (for reflexError), otherwise null
   *
   *   reflexId - a UUID4 or developer-provided unique identifier for each Reflex
   */

  beforeReflex (element, reflex, noop, reflexId) {
    // document.body.classList.add('wait')
  }

  reflexSuccess (element, reflex, noop, reflexId) {
    // show success message
  }

  reflexError (element, reflex, error, reflexId) {
    // show error message
  }

  reflexHalted (element, reflex, error, reflexId) {
    // handle aborted Reflex action
  }

  afterReflex (element, reflex, noop, reflexId) {
    // document.body.classList.remove('wait')
  }

  finalizeReflex (element, reflex, noop, reflexId) {
    // all operations have completed, animation etc is now safe
  }
}
app/javascript/controllers/user_controller.js
import ApplicationController from './application_controller'

/* This is the custom StimulusReflex controller for the User Reflex.
 * Learn more at: https://docs.stimulusreflex.com
 */
export default class extends ApplicationController {
  /*
   * Regular Stimulus lifecycle methods
   * Learn more at: https://stimulusjs.org/reference/lifecycle-callbacks
   *
   * If you intend to use this controller as a regular stimulus controller as well,
   * make sure any Stimulus lifecycle methods overridden in ApplicationController call super.
   *
   * Important:
   * By default, StimulusReflex overrides the -connect- method so make sure you
   * call super if you intend to do anything else when this controller connects.
  */

  connect () {
    super.connect()
    // add your code here, if applicable
  }

  /* Reflex specific lifecycle methods.
   *
   * For every method defined in your Reflex class, a matching set of lifecycle methods become available
   * in this javascript controller. These are optional, so feel free to delete these stubs if you don't
   * need them.
   *
   * Important:
   * Make sure to add data-controller="user" to your markup alongside
   * data-reflex="User#dance" for the lifecycle methods to fire properly.
   *
   * Example:
   *
   *   <a href="#" data-reflex="click->User#dance" data-controller="user">Dance!</a>
   *
   * Arguments:
   *
   *   element - the element that triggered the reflex
   *             may be different than the Stimulus controller's this.element
   *
   *   reflex - the name of the reflex e.g. "User#dance"
   *
   *   error/noop - the error message (for reflexError), otherwise null
   *
   *   reflexId - a UUID4 or developer-provided unique identifier for each Reflex
   */

  // Assuming you create a "User#dance" action in your Reflex class
  // you'll be able to use the following lifecycle methods:

  // beforeDance(element, reflex, noop, reflexId) {
  //  element.innerText = 'Putting dance shoes on...'
  // }

  // danceSuccess(element, reflex, noop, reflexId) {
  //   element.innerText = '\nDanced like no one was watching! Was someone watching?'
  // }

  // danceError(element, reflex, error, reflexId) {
  //   console.error('danceError', error);
  //   element.innerText = "\nCouldn\'t dance!"
  // }

  // afterDance(element, reflex, noop, reflexId) {
  //   element.innerText = '\nWhatever that was, it\'s over now.'
  // }

  // finalizeDance(element, reflex, noop, reflexId) {
  //   element.innerText = '\nNow, the cleanup can begin!'
  // }
}
app/reflexes/application_reflex.rb
# frozen_string_literal: true

class ApplicationReflex < StimulusReflex::Reflex
  # Put application-wide Reflex behavior and callbacks in this file.
  #
  # Example:
  #
  #   # If your ActionCable connection is: `identified_by :current_user`
  #   delegate :current_user, to: :connection
  #
  # Learn more at: https://docs.stimulusreflex.com/reflexes#reflex-classes
end
app/reflexes/user_reflex.rb
# frozen_string_literal: true

class UserReflex < ApplicationReflex
  # Add Reflex methods in this file.
  #
  # All Reflex instances include CableReady::Broadcaster and expose the following properties:
  #
  #   - connection  - the ActionCable connection
  #   - channel     - the ActionCable channel
  #   - request     - an ActionDispatch::Request proxy for the socket connection
  #   - session     - the ActionDispatch::Session store for the current visitor
  #   - flash       - the ActionDispatch::Flash::FlashHash for the current request
  #   - url         - the URL of the page that triggered the reflex
  #   - params      - parameters from the element's closest form (if any)
  #   - element     - a Hash like object that represents the HTML element that triggered the reflex
  #     - signed    - use a signed Global ID to map dataset attribute to a model eg. element.signed[:foo]
  #     - unsigned  - use an unsigned Global ID to map dataset attribute to a model  eg. element.unsigned[:foo]
  #   - cable_ready - a special cable_ready that can broadcast to the current visitor (no brackets needed)
  #   - reflex_id   - a UUIDv4 that uniquely identies each Reflex
  #
  # Example:
  #
  #   before_reflex do
  #     # throw :abort # this will prevent the Reflex from continuing
  #     # learn more about callbacks at https://docs.stimulusreflex.com/lifecycle
  #   end
  #
  #   def example(argument=true)
  #     # Your logic here...
  #     # Any declared instance variables will be made available to the Rails controller and view.
  #   end
  #
  # Learn more at: https://docs.stimulusreflex.com/reflexes#reflex-classes

end
おわり
まだ初歩の初歩しかやってないので、これからもう少しまともなサンプルを作ってみてまた記事にしたいです。
もしくは今回が HELLO WORLD 編だったので、 RTFM 編にて。