🔗 目次
- まえがき
- 解決したい課題
- Semantic Kernelって?
- 導入
- セマンティックスキルを作ろう
- 旧ChatSystemを置き換えてみよう
- ネイティブスキルを作ろう
- 2種類のスキルを組み合わせてみよう
- Plannerを使ってみよう
- あとがき
- 参考記事
🔗 まえがき
皆さんどうもこんにちは、株式会社ECN所属インターンのFuseです。
会社で業務として生成AIをいじくりまわしたので、それを趣味のゲーム制作に生かしたいなと思っていたところ、

おあつらえ向きのものがありました。MicroSoft社が制作した生成AIをプログラムに組み込むためのSDKで、
C#、Python、Javaで使えます。C#で使えるということは…
Unityで使えるということです。
🔗 解決したい課題
話は変わって先月にさかのぼります。
私は先月夏のTechRachoフェア2023に向けてデスクトップマスコットの記事を書きました。
その際にYahooさんの自然言語理解(V2)APIを使ってUnityちゃんをしゃべらせたのですが…
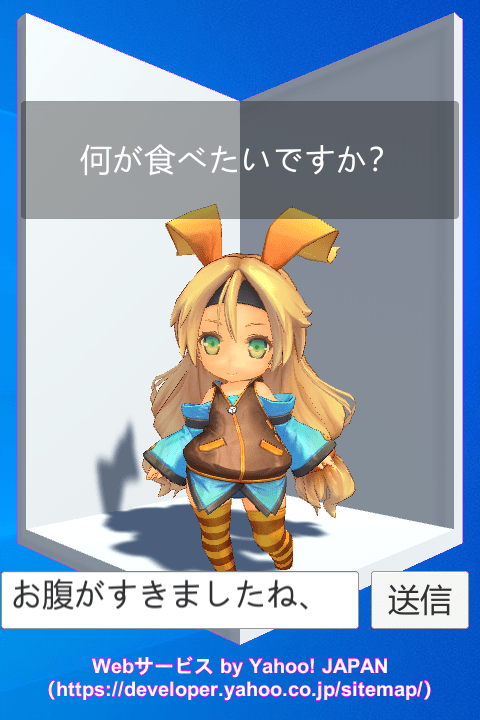
▲基本的に塩対応気味だったり…
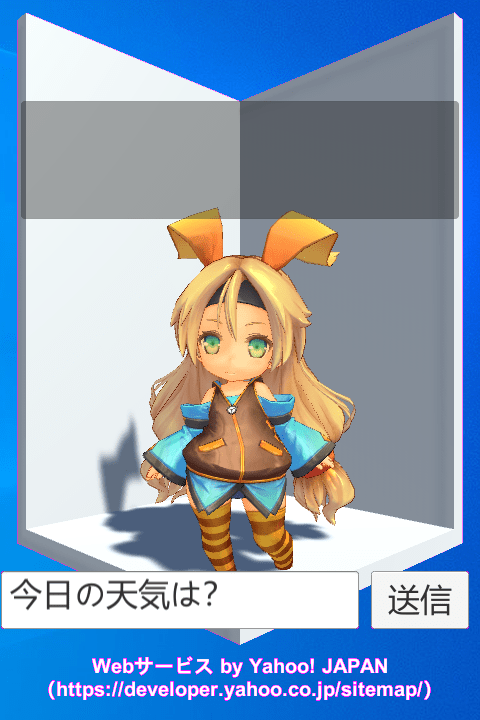
▲質問の内容によっては答えられなくなって沈黙したりと…
まだまだ課題も多く、限界を感じつつありました。
そこで、今回はSemantic Kernelを使って、OpenAIをUnityと連携させて、さらにマスコットを進化させていこうと思います!
🔗 Semantic Kernelって?
READMEによると、
Semantic Kernel is an SDK that integrates Large Language Models (LLMs) like OpenAI, Azure OpenAI, and Hugging Face with conventional programming languages like C#, Python, and Java. Semantic Kernel achieves this by allowing you to define plugins that can be chained together in just a few lines of code.
What makes Semantic Kernel special, however, is its ability to automatically orchestrate plugins with AI. With Semantic Kernel planners, you can ask an LLM to generate a plan that achieves a user's unique goal. Afterwards, Semantic Kernel will execute the plan for the user.
Semantic KernelのリポジトリのReadmeより
…とのことです。
日本語に訳したうえで要約すると、
- LLM(大規模言語モデル)をプログラムと統合するためのSDK(ソフトウェア開発キット)です
- わずか数行のコードで連結可能なプラグインを定義できます
- ゴールを達成するための実行計画を自動生成する機能があります
といった感じで、さらにC#で使えるのも個人的にうれしいポイント。
🔗 導入
それでは早速Unityに導入していきます。
パッケージをインストールする
まずはNugetでSemantic Kernelとその依存ライブラリをまとめてPackageフォルダにインストールします。
nuget install Microsoft.SemanticKernel -Prerelease -OutputDirectory ./Package
注意点として、Microsoft.SemanticKernelはリリース前のパッケージなので、-Prereleaseをつけてあげないと見つからないと怒られます。
Unityに導入する
Packageにインストールされたパッケージのフォルダの中から、パスに"lib/netstandard2.0"が含まれるdllファイルをAssets/Pluginsにコピー&ペーストします。
結論だけ言えばそれだけなのですが結構詰まりました。
↑目次に戻る
🔗 セマンティックスキルを作ろう
導入ができたらさっそく動くかどうかを確認していきましょう。
Semantic Kernelで使えるスキルは大きく分けて二つ。
- プロンプトとパラメータを基にAIが答えを生成するセマンティックスキル
- プログラムで答えを組み立てるネイティブスキル
この二つを簡単に組み合わせ、実行計画をAIに建てさせることができるのが強みです。
ですがまずほしいのは会話機能。ということでセマンティックスキルを作ります。
今回は古いChatSystemをベースに新しいチャットシステムと、そのためのスキルを作っていきます。
まずはUnityちゃんにAIになりきってもらうためのスキルを作ります。
Assets内にスキルを格納するためのSkillsフォルダ→
セマンティックスキルを入れるSemanticフォルダ→
スキルごとのフォルダといったようにフォルダを作っていきます。
Assets/Skills/Semantic/UnitychanChatを用意したら、その中に2つのファイルを用意していきます。
- Assets/Skills/Semantic/UnitychanChat/config.json
{
     "schema": 1,
     "type": "completion",
     "description": "Generates the final response to the user's statement.",
     "completion": {
          "max_tokens": 500,
          "temperature": 1,
          "top_p": 0.85,
          "presence_penalty": 0.0,
          "frequency_penalty": 0.0
     },
     "input": {
          "parameters": [
               {
                    "name": "input",
                    "description": "The user's input.",
                    "defaultValue": ""
               },
               {
                    "name": "history",
                    "description": "The history of the conversation.",
                    "defaultValue": ""
               },
          ]
     }
}
1つ目のファイルはconfig.json、スキルの定義を行うファイルです。
この中で特に重要と私が思っているのは、descriptionとinput.parametersです。
descriptionはスキルの説明文です。後々登場するPlannerにとってのスキルの用途の指標になります。
input.parametersはスキルに渡す引数のデータ。こっちもPlannerにとって大事な指標です。
- Assets/Skills/Semantic/UnitychanChat/skprompt.txt
# 指示
あなたは大鳥こはくを演じ、Userと会話してください。
AIではなく、大鳥こはくとして会話してください。
# 大鳥こはくに関する情報
## 本名
大鳥こはく
## 愛称
Unityちゃん
## 年齢
17歳
## 一人称
わたし
## 二人称
あなた
## 好物・好きな食べ物
カレーコロッケ
## 性格
活発な性格
## 夢
わたしだけの遊び場を作ること
## 口調の参考例
+ "おはよっ! 今日も元気にがんばっていこーっ!"
+ "空いてる倉庫がひとつあるんだ。自由に使っていいよって! なんかワクワクしない?"
+ "こんばんは! 今日ももうすぐ終わりだねっ! 何かいいことあったかなっ? 明日も頑張っていこうねっ!"
# 出力例
"{返答}"
---------------------------------------------

では、以上の情報と指示を踏まえ、以下の会話を完成させてください。
また、返答の長さは短い1センテンス。話し言葉かつフレンドリーなタメ口で返答してください。

{{$history}}
{{$user}}{{$input}}
{{$bot}}
skprompt.txtはスキルに使われるプロンプトが書かれたファイルです。
Markdownを使ってgpt君にわかりやすいように書いてます。
指示に加えて、演じる対象である大鳥こはくに関する情報を加えています。
↑目次に戻る
🔗 旧ChatSystemを置き換えてみよう
あとはこのスキルを使ったコードを書いて、ちゃんと動くか確認していきましょう。
- Assets/Script/NewChatSystem.cs
using UnityEngine;
using System.Collections.Generic;
using static System.Environment; //環境変数の取得に使用する
using Microsoft.SemanticKernel;  //本日の主役
using Microsoft.SemanticKernel.Orchestration;
using UnityEngine.UI;
using Microsoft.SemanticKernel.SkillDefinition;
using System.Text;
using System.Text.RegularExpressions;

namespace Assets.Script
{
    public class NewChatSystem : MonoBehaviour
    {
        [SerializeField] private Text tex;
        [SerializeField] private InputField field;
        private bool thinking=false;
        private IKernel k;//AIをのあれこれを総括するカーネル
        private readonly ChatHistory history=new() { max_history=5};//履歴の保存に使います
        private IDictionary<string, ISKFunction> semanticskills;
        private IDictionary<string, ISKFunction> omikujiskill;
        private const string SKILLDIR = "Assets/Skills";//スキルが入ってるディレクトリの相対パス
        private readonly Regex prefixCutter = new Regex(@":(.+)");//Prefixを取り払うための正規表現
        private void Awake()//初期化処理
        {
            string api_key = GetEnvironmentVariable("OPENAI_API_KEY");//APIキーを環境変数から取得します。
            k = new KernelBuilder()
            .WithOpenAIChatCompletionService("gpt-3.5-turbo",api_key)//gpt3.5turboを使います
            .Build();//カーネル生成
            semanticskills = k.ImportSemanticSkillFromDirectory(SKILLDIR, "Semantic");//スキルを読み込む
            RequestAnswer("こんにちは");
        }
        public void Question()
        {
            RequestAnswer(field.text);
        }
        async private void RequestAnswer(string input)
        {
            Debug.Log(input);
            if (thinking) return;
            string ans;
            try
            {
                thinking = true;
                tex.text = "思考中…";
                SKContext context = k.CreateNewContext();//入力値の指定に使います
                context.Variables["input"]=input;//入力
                context.Variables["history"] = history.ToString();
                Debug.Log(context.Variables["history"]);
                SKContext answer = await k.RunAsync(semanticskills["UnitychanChat"],context.Variables);//実行
                ans=answer.ToString();//結果を表示
                history.AddUserMessage(input);
                history.AddAIMessage(ans);
            }
            catch (System.Exception e)
            {
                Debug.LogException(e);//エラーを出力
                ans = "何らかのエラーが起きているみたい…";
            }
            thinking = false;
            SetText(ans);
        }
        private void SetText(string text)
        {
            Debug.Log(text);
            var mt=prefixCutter.Match(text);
            if (mt.Success)
            {
                tex.text = mt.Groups[1].Value;
            }
            else
            {
                tex.text=text;
            }
        }
    }
    [System.Serializable]
    class ChatHistory//チャット履歴を管理するクラス
    {
        private readonly Queue<string> history=new();//キューとして管理
        [SerializeField] public int max_history=3;//保持できる最大履歴数
        public void AddUserMessage(string input)
        {
            EnQueueMessage("User:" + input);
        }
        public void AddAIMessage(string input)
        {
            EnQueueMessage("Bot:"+input);
        }
        public void AddSystemMessage(string input)
        {
            EnQueueMessage("System:" + input);
        }
        private void EnQueueMessage(string mes)
        {
            history.Enqueue(mes);
            while (history.Count > max_history)//max_history個になるまででキューする
            {
                history.Dequeue();
            }
        }
        public override string ToString()
        {
            StringBuilder sb = new();
            foreach(var s  in history)
            {
                sb.Append(s);
                sb.Append('\n');
            }
            return sb.ToString();
        }
    }
}
※このプログラムを動かすにはAPIキーをあらかじめ環境変数OPENAI_API_KEYに入れておく必要があります。
Awake()
Semantic Kernelの機能を使うには、Kernelがまず必要です。
22行目でKernelを生成するためのBuilderを生成し、
23行目で使用するOpenAIのサービスを登録。
最後に24行目でKernelを生成しています。
まずはスキルが入っている親ディレクトリとスキルのフォルダ名を指定することでスキルをインポート。
Semanticフォルダ内のスキルがまとめてインポートされます。
RequestAnswer()
思考中じゃないことを確認した後、入力値を指定するためのContextを生成。
Contextに値を登録したら。スキルを実行し、結果を待ちます。
最後に結果をstringにしたものをtextの内容に代入すれば、結果が画面に表示されるという仕組みです!
ChatHistory
また、チャットの履歴を保存するためにChatHistoryというQueueを内部に持つクラスを作成しました。
生成時に履歴の最大保持数を指定することが可能で、これによりトークン数の爆発を抑えています。
このコンポーネントをChatSystemと入れ替えて動かしてみると…?
無事、Unityちゃんになりきって喋ってくれました!
🔗 ネイティブスキルを作ろう
これだけだと"じゃあOpenAI APIでよくない…?"とか言われそうなので、今度はネイティブスキルを作ってみます。
出来そうなことは色々あれど、今回は「占い機能」を追加していることにします。
- Assets/Skills/Native/Omikuji/Omikuji.cs
using Microsoft.SemanticKernel.SkillDefinition;
using UnityEngine;
using System.ComponentModel;
using System.Text;
using System.Runtime.InteropServices;

public class Omikuji
{

    private readonly string[] comments = {
            "新たな言語の習得を目指すといいことあるかも",
            "喫茶店に行くといいことあるかも",
            "動物に会いに行くといいことあるかも",
            "新たな仲間と出会えるかも",
            "すごい人に認められるかも",
            "待ち人に会えるかも",
            "プロジェクト破損に注意すべし",
            "足元注意!転ばないよう気を付けるべし",
            "メールの送信先をよく確認すべし",
            "傘を持ち歩くべし",
    };
   [SKFunction, Description("output Result of the fortune.")]
    public string PickOmikuji(string input)
    {
        StringBuilder sb = new StringBuilder();
        var rand = Random.Range(0, 9);
        if(rand == 0)
        {
            sb.Append("Luck:大吉¥n");
        }else if (rand <= 2)
        {
            sb.Append("Luck:中吉¥n");
        }
        else if (rand <= 5)
        {
            sb.Append("Luck:吉¥n");
        }
        else if (rand <= 7)
        {
            sb.Append("Luck:小吉¥n");
        }
        else
        {
            sb.Append("Luck:凶¥n");
        }
        sb.Append("Comment:" + comments[Random.Range(0, 10)]+"\n");
        return sb.ToString();
    }
}
コードの内容は単純明快。入力の内容にかかわらず
Luck:[大吉、中吉、吉、小吉、凶のいずれかの運勢]
Comment:[10種類のうちいずれかの補足コメント]
を返します。
LuckとCommentは独立しており、Commentの内容は運勢に関係なくランダムに決定されます。
ですがこれを表示するだけだと味気ないですね。
🔗 2種類のスキルを組み合わせてみよう
その後はそれを基に返答を生成するセマンティックスキルを作ります。
さっきと同じようにAssets/Skills/Semantic/UnitychanOmikujiを用意したら、その中に2つのファイルを同じように用意していきます。
- Assets/Skills/Semantic/UnitychanOmikuji/config.json
{
     "schema": 1,
     "type": "completion",
     "description": "Generates the final response from Result of the fortune.",
     "completion": {
          "max_tokens": 500,
          "temperature": 1,
          "top_p": 0.85,
          "presence_penalty": 0.0,
          "frequency_penalty": 0.0
     },
     "input": {
          "parameters": [
               {
                    "name": "input",
                    "description": "Result of the fortune",
                    "defaultValue": ""
               },
               {
                    "name": "history",
                    "description": "The history of the conversation.",
                    "defaultValue": ""
               },
          ]
     }
}
1つ目のファイルはconfig.json、スキルの定義を行うファイルです。
前のスキルとほぼ同じですが、descriptionを変えてあります。
- Assets/Skills/Semantic/UnitychanOmikuji/skprompt.txt
# 指示
あなたは大鳥こはくを演じ、Userと会話してください。
AIではなく、大鳥こはくとして会話してください。
# 大鳥こはくに関する情報
## 本名
大鳥こはく
## 愛称
Unityちゃん
## 年齢
17歳
## 一人称
わたし
## 二人称
あなた
## 好物・好きな食べ物
カレーコロッケ
## 性格
活発な性格
## 夢
わたしだけの遊び場を作ること
## 口調の参考例
+ "おはよっ! 今日も元気にがんばっていこーっ!"
+ "空いてる倉庫がひとつあるんだ。自由に使っていいよって! なんかワクワクしない?"
+ "こんばんは! 今日ももうすぐ終わりだねっ! 何かいいことあったかなっ? 明日も頑張っていこうねっ!"
# 出力例
"おみくじの結果が出たよ!{Luck}だって!{Comment}って書いてあるね。{感想}"
---------------------------------------------

では、以上の情報と指示を踏まえ、以下の会話を完成させてください。
また、返答の長さは短い1センテンス。話し言葉かつフレンドリーなタメ口で話してください。

{{$history}}
System:Userの運勢を占った結果が出ました。結果は
{{$input}}
です。この結果を感想も交えながらUserに伝えてください。
{{$bot}}
こっちも基本的なところは前と同じですが、Inputの発言主のロールをSystemに変えています。
こういった発言内容の誘導は、Systemロールの出番ですね。
最後に、二つのスキルを組み合わせ、答えを返すようにNewChatSystemを作りかえれば…
- Assets/Script/NewChatSystem.cs
using UnityEngine;
using System.Collections.Generic;
using static System.Environment; //環境変数の取得に使用する
using Microsoft.SemanticKernel;  //本日の主役
using Microsoft.SemanticKernel.Orchestration;
using UnityEngine.UI;
using Microsoft.SemanticKernel.SkillDefinition;
using System.Text;
using System.Text.RegularExpressions;

namespace Assets.Script
{
    public class NewChatSystem : MonoBehaviour
    {
        [SerializeField] private Text tex;
        [SerializeField] private InputField field;
        private bool thinking=false;
        private IKernel k;//AIをのあれこれを総括するカーネル
        private readonly ChatHistory history=new() { max_history=5};//履歴の保存に使います
        private IDictionary<string, ISKFunction> semanticskills;
        private IDictionary<string, ISKFunction> omikujiskill;
        private const string SKILLDIR = "Assets/Skills";//スキルが入ってるディレクトリの相対パス
        private readonly Regex prefixCutter = new Regex(@":(.+)");//Prefixを取り払うための正規表現
        private void Awake()//初期化処理
        {
            string api_key = GetEnvironmentVariable("OPENAI_API_KEY");//APIキーを環境変数から取得します。
            k = new KernelBuilder()
            .WithOpenAIChatCompletionService("gpt-3.5-turbo",api_key)//gpt3.5turboを使います
            .Build();//カーネル生成
            semanticskills = k.ImportSemanticSkillFromDirectory(SKILLDIR, "Semantic");//スキルを読み込む
            omikujiskill = k.ImportSkill(new Omikuji(), "PickOmikuji");
            RequestUranai();
        }
        public void Question()
        {
            RequestAnswer(field.text);
        }
        async private void RequestAnswer(string input)
        {
            Debug.Log(input);
            if (thinking) return;
            string ans;
            try
            {
                thinking = true;
                tex.text = "思考中…";
                SKContext context = k.CreateNewContext();//入力値の指定に使います
                context.Variables["input"]=input;//入力
                context.Variables["history"] = history.ToString();
                Debug.Log(context.Variables["history"]);
                SKContext answer = await k.RunAsync(semanticskills["UnitychanChat"],context.Variables);//実行
                ans=answer.ToString();//結果を表示
                history.AddUserMessage(input);
                history.AddAIMessage(ans);
            }
            catch (System.Exception e)
            {
                Debug.LogException(e);//エラーを出力
                ans = "何らかのエラーが起きているみたい…";
            }
            thinking = false;
            SetText(ans);
        }
        async private void RequestUranai()
        {
            if (thinking) return;
            string ans;
            try
            {
                Plan p = new Plan("おみくじを引いて結果を伝える",omikujiskill["PickOmikuji"], semanticskills["UnitychanOmikuji"]);
                thinking = true;
                tex.text = "思考中…";
                SKContext context = k.CreateNewContext();//入力値の指定に使います
                context.Variables["history"] = history.ToString();
                SKContext answer = await p.InvokeAsync(context.Variables);
                ans = answer.ToString();//結果を表示
                history.AddAIMessage(ans);
            }
            catch (System.Exception e)
            {
                Debug.LogException(e);//エラーを出力
                ans = "何らかのエラーが起きているみたい…";
            }
            thinking = false;
            SetText(ans);
        }
        private void SetText(string text)
        {
            Debug.Log(text);
            var mt=prefixCutter.Match(text);
            if (mt.Success)
            {
                tex.text = mt.Groups[1].Value;
            }
            else
            {
                tex.text=text;
            }
        }
    }
    [System.Serializable]
    class ChatHistory//チャット履歴を管理するクラス
    {
        private readonly Queue<string> history=new();//キューとして管理
        [SerializeField] public int max_history=3;//保持できる最大履歴数
        public void AddUserMessage(string input)
        {
            EnQueueMessage("User:" + input);
        }
        public void AddAIMessage(string input)
        {
            EnQueueMessage("Bot:"+input);
        }
        public void AddSystemMessage(string input)
        {
            EnQueueMessage("System:" + input);
        }
        private void EnQueueMessage(string mes)
        {
            history.Enqueue(mes);
            while (history.Count > max_history)//max_history個になるまででキューする
            {
                history.Dequeue();
            }
        }
        public override string ToString()
        {
            StringBuilder sb = new();
            foreach(var s  in history)
            {
                sb.Append(s);
                sb.Append('\n');
            }
            return sb.ToString();
        }
    }
}
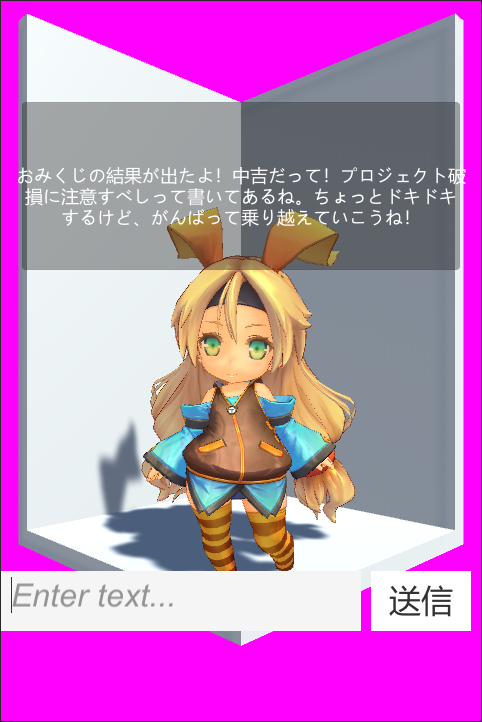
▲どう見てもドキドキするじゃすまないと思うの
今回主に手を入れたのはAwake()と新たに作ったRequestUranai()の二つの関数です。
Awake()では
omikujiskill = k.ImportSkill(new Omikuji(), "PickOmikuji");
でさっき作ったネイティブスキルを読み込んでいます。
読み込まれたスキルはセマンティックスキルのときと同じく<string,ISKFunction>の辞書型で排出されます。
ですが今回のキーはディレクトリ名ではなく関数名なので気を付けましょう。
RequestUranai()
RequestUranai()の流れはRequestAnswer()と大体同じなのですが、
今回はPlanクラスを使っています。
Planクラスは実行結果を後ろのスキルに渡しながらチェーンしてくれる便利な代物です。
さらにこれを自動生成できるPlannerクラスも備わっているので今度はそれを使ってみましょう。
🔗 Plannerを使ってみよう
最後に、Plannerを使って占いと雑談を自動で振り分けさせます。
ぶっちゃけ今はユースケースが2つなのでSwitchで済みますが、今後のことを考えてPlannerに切り替えます。
- Assets/Script/NewChatSystem.cs
using UnityEngine;
using System.Collections.Generic;
using static System.Environment; //環境変数の取得に使用する
using Microsoft.SemanticKernel;  //本日の主役
using Microsoft.SemanticKernel.Orchestration;
using UnityEngine.UI;
using Microsoft.SemanticKernel.SkillDefinition;
using System.Text;
using System.Text.RegularExpressions;
using Microsoft.SemanticKernel.Planning;
using System.Text.Json;
using System.Text.Unicode;
using System.Text.Encodings.Web;
namespace Assets.Script
{
    public class NewChatSystem : MonoBehaviour
    {
        [SerializeField] private Text tex;
        [SerializeField] private InputField field;
        private bool thinking=false;
        private IKernel k;//AIをのあれこれを総括するカーネル
        private readonly ChatHistory history=new() { max_history=5};//履歴の保存に使います
        private const string SKILLDIR = "Assets/Skills";//スキルが入ってるディレクトリの相対パス
        private readonly Regex prefixCutter = new Regex(@".*:(.+)", RegexOptions.Multiline);//Prefixを取り払うための正規表現
        private SequentialPlanner planner;
        private void Awake()//初期化処理
        {
            string api_key = GetEnvironmentVariable("OPENAI_API_KEY");//APIキーを環境変数から取得します。
            k = new KernelBuilder()
            .WithOpenAIChatCompletionService("gpt-3.5-turbo",api_key)//gpt3.5turboを使います
            .Build();//カーネル生成
            k.ImportSemanticSkillFromDirectory(SKILLDIR, "Semantic");//スキルを読み込む
            k.ImportSkill(new Omikuji(), "PickOmikuji");
            planner = new SequentialPlanner(k);
        }
        public void Question()
        {
            RequestAnswerWithPlanner(field.text);
        }
        async private void RequestAnswerWithPlanner(string input)
        {
            Debug.Log(input);
            if (thinking) return;
            string ans;
            try
            {
                thinking = true;
                tex.text = "思考中…";
                SKContext context = k.CreateNewContext();//入力値の指定に使います
                context.Variables["input"] = input;//入力
                context.Variables["history"] = history.ToString();
                Plan plan = await planner.CreatePlanAsync("Userが\""+input+"\"と言っています。Userの要求をくみ取り返答を生成してください。");
                Debug.Log(JsonSerializer.Serialize(plan, options: new()
                {
                    WriteIndented = true,
                    Encoder = JavaScriptEncoder.Create(UnicodeRanges.All),
                }));
                SKContext answer = await k.RunAsync(plan,context.Variables);
                ans = answer.ToString();//結果を表示
                history.AddUserMessage(input);
                history.AddAIMessage(ans);
            }
            catch (System.Exception e)
            {
                Debug.LogException(e);//エラーを出力
                ans = "何らかのエラーが起きているみたい…";
            }
            thinking = false;
            SetText(ans);
        }
        private void SetText(string text)
        {
            Debug.Log(text);
            var mt=prefixCutter.Match(text);
            if (mt.Success)
            {
                tex.text = mt.Groups[1].Value;
            }
            else
            {
                tex.text=text;
            }
        }
    }
    [System.Serializable]
    class ChatHistory//チャット履歴を管理するクラス
    {
        private readonly Queue<string> history=new();//キューとして管理
        [SerializeField] public int max_history=3;//保持できる最大履歴数
        public void AddUserMessage(string input)
        {
            EnQueueMessage("User:" + input);
        }
        public void AddAIMessage(string input)
        {
            EnQueueMessage("Bot:"+input);
        }
        public void AddSystemMessage(string input)
        {
            EnQueueMessage("System:" + input);
        }
        private void EnQueueMessage(string mes)
        {
            history.Enqueue(mes);
            while (history.Count > max_history)//max_history個になるまででキューする
            {
                history.Dequeue();
            }
        }
        public override string ToString()
        {
            StringBuilder sb = new();
            foreach(var s  in history)
            {
                sb.Append(s);
                sb.Append('\n');
            }
            return sb.ToString();
        }
    }
}
いくつもあった回答生成処理を1つにまとめたことでだいぶすっきりしましたし、
ユースケースの増加にも柔軟に対応できる仕組みが出来上がりました。
実際に実行してみると、こんな感じに入力に応じてプランを組んでくれています。
コツはユーザーの入力をそのまま使うのではなく入力プロンプトの中の"文字列"として扱ってやることです。
こうすることであくまでも主の目的が返答の生成であることをAIに意識させます。
また、"こんにちは"と入力した際のPlanと"占ってほしい"と入力した際のPlanを比べてみると、
{
  "state": [
    {
      "Key": "INPUT",
      "Value": ""
    }
  ],
  "steps": [
    {
      "state": [
        {
          "Key": "INPUT",
          "Value": ""
        }
      ],
      "steps": [],
      "parameters": [
        {
          "Key": "bot",
          "Value": "$BOT"
        },
        {
          "Key": "user",
          "Value": "$USER"
        },
        {
          "Key": "INPUT",
          "Value": "こんにちは"
        },
        {
          "Key": "history",
          "Value": "$HISTORY"
        }
      ],
      "outputs": [
        "RESULT__RESPONSE"
      ],
      "next_step_index": 0,
      "name": "UnitychanChat",
      "skill_name": "Semantic",
      "description": "Generates the final response to the user\u0027s statement."
    }
  ],
  "parameters": [
    {
      "Key": "INPUT",
      "Value": ""
    }
  ],
  "outputs": [
    "RESULT__RESPONSE"
  ],
  "next_step_index": 0,
  "name": "",
  "skill_name": "Microsoft.SemanticKernel.Planning.Plan",
  "description": "Userが\u0022こんにちは\u0022と言っています。Userの要求をくみ取り返答を生成してください。"
}
{
  "state": [
    {
      "Key": "INPUT",
      "Value": ""
    }
  ],
  "steps": [
    {
      "state": [
        {
          "Key": "INPUT",
          "Value": ""
        }
      ],
      "steps": [],
      "parameters": [
        {
          "Key": "INPUT",
          "Value": ""
        }
      ],
      "outputs": [
        "OMIKUJI_RESULT"
      ],
      "next_step_index": 0,
      "name": "PickOmikuji",
      "skill_name": "PickOmikuji",
      "description": "output Result of the fortune."
    },
    {
      "state": [
        {
          "Key": "INPUT",
          "Value": ""
        }
      ],
      "steps": [],
      "parameters": [
        {
          "Key": "bot",
          "Value": ""
        },
        {
          "Key": "INPUT",
          "Value": "$OMIKUJI_RESULT"
        },
        {
          "Key": "history",
          "Value": ""
        }
      ],
      "outputs": [],
      "next_step_index": 0,
      "name": "UnitychanOmikuji",
      "skill_name": "Semantic",
      "description": "Generates the final response from Result of the fortune."
    }
  ],
  "parameters": [
    {
      "Key": "INPUT",
      "Value": ""
    }
  ],
  "outputs": [],
  "next_step_index": 0,
  "name": "",
  "skill_name": "Microsoft.SemanticKernel.Planning.Plan",
  "description": "Userが\u0022私を占って\u0022と言っています。Userの要求をくみ取り返答を生成してください。"
}
どちらも無駄なスキルを挟まず前者は1手、後者は2手で回答を生成していますね。
こういう複数スキルの連携に弱いイメージのある3.5ターボですが、
プロンプトや説明文をちゃんと練ってあげればこのようにしっかりプランを書いてくれるのです。
🔗 あとがき
今回はSemantic Kernelを使ってデスクトップマスコットを進化させてみました。
プロンプトによって与えられた役柄を見事にこなし、ユーザの要望に応じて処理を切り替える。
中々に扱いやすい代物だと思います。
この記事を読んだ皆さんもAIをUnityのプロジェクトに組み込んでみませんか?
では、以上ECN所属インターンのFuseがお送りしました。
↑目次に戻る
🔗 参考記事
- Semantic Kernel でプランナーを使って自発的に解決策を考えて実行する AI を作ってみよう|Kazuki Ota
- Semantic Kernel の Plan ディープダイブ|Kazuki Ota
![]()
株式会社ECNはPHP、JavaScriptを中心にお客様のご要望に合わせたwebサービス、システム開発を承っております。
ビジネスの最初から最後までサポートを行い
お客様のイメージに合わせたWebサービス、システム開発、デザインを行います。
この作品はユニティちゃんライセンス条項の元に提供されています