🔗目次
🔗まえがき
皆さんどうもこんにちは、株式会社ECN所属インターンのFuseです。
皆さんはIKEMEN Goという格闘ゲームエンジンをご存じですか?

このエンジンは"MUGEN"という格闘ゲームエンジンから派生したオープンソースの格闘エンジン"IKEMEN"をGo言語で記述したもので、MITライセンスです。
MITライセンスです。
ZSSとは?
そんなIKEMEN Goを代表する機能の一つがZSS(Zantei State Script)、今まではキャラクターの動作をつかさどるコード部分にはCNSという独自言語が使われていましたが、これをGo言語の構文で記述できます。ifもswitchもローカル変数も関数も使えます。便利で見慣れた構文で書けてしかも保守性が高い!最高ではありませんか!
というわけで今日はZSSを使って本体に付属しているプリセットキャラクター、カンフーマンを大改造していきます!
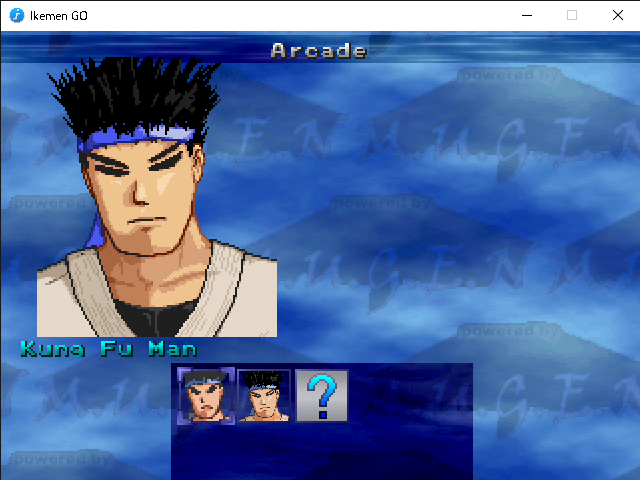
▲解像度が高いのと低いのがいますが今回は新版である解像度低い方を改造します。
🔗完成品
🔗習うより慣れろ!カンフーマン大改造計画!
というわけでまずはやってみます。カンフーマンを改造して、ちょっと特殊なシステムを搭載してみます。
goとzssの主な違いをあらかじめ押さえておこう
| golang | zss | |
|---|---|---|
| コメント | // コメント | # コメント |
| ローカル変数初期化 | 変数名:=初期値; | let 変数名=初期値; |
| ローカル変数参照 | 変数名 | $変数名 |
| グローバル変数参照 | 変数名 | Var(Var番号) |
| ローカル変数代入 | 変数名=値; | $変数名=値; |
| グローバル変数代入 | 変数名=値; | Var(Var番号):=値; |
| 関数定義 | func 関数名(引数名と型)(返り値の型){} | [Function 変数名(引数名) 返り値名] |
| 関数呼び | 関数名(引数); | call 関数名(引数); |
ソースコードを見てみよう
というわけでまずは本体に同梱されているkfmZ内のzssファイルを見ながらステートの構造を理解していきます。
例として、立ち小パンチのステートを見ていきましょう。
#===============================================================================
# Stand Light Punch
#===============================================================================
# ZSS difficulty: easy
[StateDef 200;
type: S;                              #State-type: S-stand, C-crouch, A-air, L-liedown
movetype: A;                          #Move-type: A-attack, I-idle, H-gethit
physics: S;                           #Physics: S-stand, C-crouch, A-air
juggle: 1;                            #Number of air juggle points move takes
#Commonly-used controllers:
velset: 0, 0;                         #Set velocity (x, y) (Def: no change)
ctrl: 0;                              #Set ctrl (Def: no change)
anim: 200;                            #Change animation (Def: no change)
poweradd: 10;                         #Power to add (Def: 0)
sprpriority: 2;]                      #Set p1's sprite layering priority to 2 (in front)

if animElem = 3 {
    #When using zss sctrls, you must have the bracket on the same line as the
    #sctrl's name as specified below e.g. "HitDef{"
    hitDef{
        attr: S, NA;                  #Attribute: Standing, Normal Attack
        damage: 23, 0;                #Damage that move inflicts, guard damage
        animtype: Light;              #Animation type: Light, Medium, Heavy, Back (def: Light)
        guardflag: MA;                #Flags on how move is to be guarded against
        hitflag: MAF;                 #Flags of conditions that move can hit
        priority: 3, Hit;             #Attack priority: 0 (least) to 7 (most), 4 default
                                      #Hit/Miss/Dodge type (Def: Hit)
        pausetime: 8, 8;              #Time attacker pauses, time opponent shakes
        sparkno: 0;                   #Spark anim no (Def: set above)
        sparkxy: -10, -76;            #X-offset for the "hit spark" rel. to p2,
                                      #Y-offset for the spark rel. to p1
        hitsound: 5, 0;               #Sound to play on hit
        guardsound: 6, 0;             #Sound to play on guard
        ground.type: High;            #Type: High, Low, Trip (def: Normal)
        ground.slidetime: 5;          #Time that the opponent slides back
        ground.hittime: 11;           #Time opponent is in hit state
        ground.velocity: -4;          #Velocity at which opponent is pushed
        airguard.velocity: -1.9, -.8; #Guard velocity in air (def: (air.xvel*1.5, air.yvel/2))
        air.type: High;               #Type: High, Low, Trip (def: same as ground.type)
        air.velocity: -1.4, -3;       #X-velocity at which opponent is pushed,
                                      #Y-velocity at which opponent is pushed
        air.hittime: 15;              #Time before opponent regains control in air
    }
}

if time = 1 {
    #It is worth mentioning that if you want to use the rest of the parameters
    #a playSnd uses, you can use it just the same as below:
    # Playsnd{value: S0, 0; channel: 1}
    call CSnd(0, 0, 1);
}

#Change to stand state when done
call EndState(0);
StateDefを見てみよう
順にみていきましょう。 まずはステートを定義するためのStateDef部分から。
全てのステートはここから始まります。
[StateDef 200;
type: S;                              #State-type: S-stand, C-crouch, A-air, L-liedown
movetype: A;                          #Move-type: A-attack, I-idle, H-gethit
physics: S;                           #Physics: S-stand, C-crouch, A-air
juggle: 1;                            #Number of air juggle points move takes
#Commonly-used controllers:
velset: 0, 0;                         #Set velocity (x, y) (Def: no change)
ctrl: 0;                              #Set ctrl (Def: no change)
anim: 200;                            #Change animation (Def: no change)
poweradd: 10;                         #Power to add (Def: 0)
sprpriority: 2;]                      #Set p1's sprite layering priority to 2 (in front)
StateDef内ではステートの番号を指定した後、
パラメータ名:値;
のように記述していきます。
ここに書いてある記述をわかりやすく解説すると、
ステートのタイプ(立ち、しゃがみ、空中、ダウン)は立ちです。
動きのタイプ(攻撃、待機、くらい)は攻撃です。
物理のタイプ(立ち、しゃがみ、空中)は立ちです。
キャラの移動速度を0にします。
このステート中は操作が利きません。
200番のアニメーションを再生します。
このステートに到達時、必殺技ゲージが1%増えます。(100%で1本、基本的に一番強い技は3本使います。)
スプライトの優先度は2です。
といった内容で、ステート全体にかかわる情報を定義していきます。
次に書かれているのは3枚目のスプライトになったら当たり判定を定義する処理です。
if animElem = 3 {
    #When using zss sctrls, you must have the bracket on the same line as the
    #sctrl's name as specified below e.g. "HitDef{"
    hitDef{
        attr: S, NA;                  #Attribute: Standing, Normal Attack
        damage: 23, 0;                #Damage that move inflicts, guard damage
        animtype: Light;              #Animation type: Light, Medium, Heavy, Back (def: Light)
        guardflag: MA;                #Flags on how move is to be guarded against
        hitflag: MAF;                 #Flags of conditions that move can hit
        priority: 3, Hit;             #Attack priority: 0 (least) to 7 (most), 4 default
                                      #Hit/Miss/Dodge type (Def: Hit)
        pausetime: 8, 8;              #Time attacker pauses, time opponent shakes
        sparkno: 0;                   #Spark anim no (Def: set above)
        sparkxy: -10, -76;            #X-offset for the "hit spark" rel. to p2,
                                      #Y-offset for the spark rel. to p1
        hitsound: 5, 0;               #Sound to play on hit
        guardsound: 6, 0;             #Sound to play on guard
        ground.type: High;            #Type: High, Low, Trip (def: Normal)
        ground.slidetime: 5;          #Time that the opponent slides back
        ground.hittime: 11;           #Time opponent is in hit state
        ground.velocity: -4;          #Velocity at which opponent is pushed
        airguard.velocity: -1.9, -.8; #Guard velocity in air (def: (air.xvel*1.5, air.yvel/2))
        air.type: High;               #Type: High, Low, Trip (def: same as ground.type)
        air.velocity: -1.4, -3;       #X-velocity at which opponent is pushed,
                                      #Y-velocity at which opponent is pushed
        air.hittime: 15;              #Time before opponent regains control in air
    }
}
ステートコントローラーを見てみよう
皆さんご存じifの解説はスルーして、中にある見慣れないブツを解説していきます。
hitDef{
        attr: S, NA;                  #Attribute: Standing, Normal Attack
        damage: 23, 0;                #Damage that move inflicts, guard damage
        animtype: Light;              #Animation type: Light, Medium, Heavy, Back (def: Light)
        guardflag: MA;                #Flags on how move is to be guarded against
        hitflag: MAF;                 #Flags of conditions that move can hit
        priority: 3, Hit;             #Attack priority: 0 (least) to 7 (most), 4 default
                                      #Hit/Miss/Dodge type (Def: Hit)
        pausetime: 8, 8;              #Time attacker pauses, time opponent shakes
        sparkno: 0;                   #Spark anim no (Def: set above)
        sparkxy: -10, -76;            #X-offset for the "hit spark" rel. to p2,
                                      #Y-offset for the spark rel. to p1
        hitsound: 5, 0;               #Sound to play on hit
        guardsound: 6, 0;             #Sound to play on guard
        ground.type: High;            #Type: High, Low, Trip (def: Normal)
        ground.slidetime: 5;          #Time that the opponent slides back
        ground.hittime: 11;           #Time opponent is in hit state
        ground.velocity: -4;          #Velocity at which opponent is pushed
        airguard.velocity: -1.9, -.8; #Guard velocity in air (def: (air.xvel*1.5, air.yvel/2))
        air.type: High;               #Type: High, Low, Trip (def: same as ground.type)
        air.velocity: -1.4, -3;       #X-velocity at which opponent is pushed,
                                      #Y-velocity at which opponent is pushed
        air.hittime: 15;              #Time before opponent regains control in air
    }
これはステートコントローラー(以下ステコンと呼称)と呼ばれていて、攻撃したり弾を飛ばしたり色いじったり体力減らしたり増やしたり色々できます。
ステコン名{パラメータ名:値;}
の形式で記述していきます。
今回使うステコンはHitDef、当たり判定を有効化するステコンです。
わかりやすく解説すると、
これは立ち通常攻撃です。
当てれば23ダメージですがガードされると0ダメージです。
弱攻撃です。
地上か空中時ガードできます。
地上の相手、空中にいる相手、ダウンしている相手に当たります。
攻撃の優先度は3、同じ優先度でかち合ったら当たります。
ヒットストップはお互い8フレームです。
ヒットスパークは0番です。
-10,-76の位置にヒットスパークを出します。
効果音は軽い打撃音です。
ガードの音も軽いです。
地上でくらった相手は強くのけぞります。
そして8フレーム間速度-4でスライドします。
くらい状態は11フレーム続きます。
空中でくらった相手は強くのけぞります。
横マイナス1.4、縦-3の速度で吹っ飛びます。
くらい状態は15フレーム続きます。
となります。
これで大体の構造は理解できました。早速zssを書いていきましょう。
早速書いてみよう
それでは早速システムを実装していきます。
ポイントを必殺技で貯めていこう
まずはポイントシステムを実装するために、ポイントを増やしたり減らしたりする関数を作っていきましょう。
[Function ChangePoint(d)]
Var(3):=Var(3)+$d;#ポイント増加
if Var(3)>10{#10を超えていたら
    Var(3):=10;#10にする
}
else if Var(3)<0{#0未満なら
    Var(3):=0;#0にする
}
渡された引数dをVar(3)に加算し、その後0~10の範囲に収める関数です。
その後は必殺技や超必殺技を当てたときにポイントを加算し、アイコンを描画する処理を作りましょう。
[StateDef -2]#毎フレーム実行される
if MoveHit=1{#もし攻撃が当たったら
    if HitDefAttr= SCA,S{#必殺技なら
        call ChangePoint(1);
    }
    else if HitDefAttr= SCA,H{#超必殺技なら
        call ChangePoint(2);
    }
}
ignorehitpause {#ヒットストップ中も実行する
    if Var(3)>0{
        for i=0;Var(3)-1;1{#forで回す
            let xdiff=$i%5-2;
            let ydiff=floor($i/5);
            Explod{anim:191;pos:$xdiff*10,-150+$ydiff*20;removetime:1;postype:p1;scale:0.5,0.5;}#木の板(アイコン)を描画
        }
    }
}
MoveHitはHitDefで定義した攻撃が命中した時に1を、それ以外は0を返すトリガーです。
それを使い攻撃がヒットした後、HitDefAttrで攻撃の種類を確認し、種類に応じポイントを加算します。
その後はforを使って位置をずらしながらポイントの数だけアイコンを描画する処理をignorehitpauseで囲うことで常に実行させています。
こういった常に実行したい処理には-2番ステートを割り振ります。
-2番は特殊なステート番号で、特殊ゲージの処理など必ず処理させ続けたい特殊システム管理ステートに使われます。
これでポイントをためて、それに応じてアイコンを描画する部分ができました。
一撃必殺技を作ろう
後はこのポイントを使って一撃必殺技を使えるようにします。
具体的に言うとポイントが10の時にzボタンを押すことでスマッシュカンフーアッパーと同じモーションの一撃必殺技が使えるようにします。
[StateDef 3060;
type: S; movetype: A; physics: S;
juggle: 4; velset: 0, 0; anim: 3050;
ctrl: 0; sprpriority: 2;]
Var(3):=0;
if animElemTime(4) >= 0 && animElemTime(16) < 0 {
    width{value: 5, 0}
}

if animElem = 2 {
    superPause{
        pos: -5, -55;
        anim: 100;
        sound: 20, 0;
    }
    notHitBy{value: , NA, SA, AT; time: 6}
}

if animElemTime(2) >= 0 {
    afterImageTime{time: 2}
}

if animElem = 4 {
    call CSnd(0, 2, 1);
}

if time = 0 {
    hitDef{
        attr: S, HA;
        animtype: Up;                #Make p2 use "Up" type animation on hit
        damage: 1000000;
        getpower: 0;
        priority: 5;
        guardflag: MA;
        pausetime: 30, 30;
        sparkno: 3;
        sparkxy: 0, -110;
        hitsound: 5, 4;
        guardsound: 6, 0;
        ground.type: Low;
        ground.slidetime: 26;
        ground.hittime: 28;
        ground.velocity: -1.3, -200;
        guard.velocity: -11;
        air.velocity: -1.3, -200;
        airguard.velocity: -4.5, -5;
        envshake.time: 25;           #Parameters for shaking the screen on hit
        envshake.ampl: 7;
        envshake.freq: 176;
        p2facing: 1;                 #Force p2 to face p1 on hit
        fall: 1;
        fall.recover: 0;             #Prevent p2 from recovering
        fall.damage: 70;             #p2 will take 70 damage on hitting the ground
        fall.envshake.ampl: 6;       #Parameters for shaking the screen on fall
        fall.envshake.freq: 178;
        fall.envshake.time: 15;
        mindist: 50, -100;           #Keep p2 a minimum of 50 pixels away from p1, and no higher than 100 pixels up
        maxdist: 100, -10;           #Keep p2 a maximum of 100 pixels away from p1, and no lower than 10 pixels below
        yaccel: .8;                  #Accelerate p2 downwards rapidly
    }
}

#This controller below makes Kung Fu man change to a success state if he
#successfully hits the Smash Kung Fu Upper.
if moveHit {
    changeState{value: 3051}
}

call EndState(0);
スマッシュカンフーアッパーの記述をもとにポイントを0にする記述を追加、ステート番号とダメージと吹っ飛ばしベクトルを変更し、必殺技ゲージを1本消費する記述を削除しました。
ですがこのままでは使えません。なのでコマンドによる技の発動処理が書かれているcommand.zssに次の記述を追加します。
if command = "z" && Var(3) >=10 && stateType != A &&
    (ctrl ||
        (hitDefAttr = SC, NA, SA, HA && stateNo != [3050, 3100] && moveContact) ||
        (stateNo = 1310 || stateNo = 1330)) { #From blocking
    changeState{value: 3060}
}
発動条件から必殺技ゲージが1本あるを削除し、新たにポイントが10あるを追加しました。
また、コマンドもzボタンにしています。
これで、ポイントをためて一撃必殺技を使えるようになりました。
↑目次に戻る
🔗あとがき
どうでしたか?
こういったエンジンの独自言語は構文も独自なことが多いのですが、見慣れた構文が扱えるということは、とても快適ですね。それでは、またいつかお会いしましょう!。
![]()
株式会社ECNはPHP、JavaScriptを中心にお客様のご要望に合わせたwebサービス、システム開発を承っております。
ビジネスの最初から最後までサポートを行い
お客様のイメージに合わせたWebサービス、システム開発、デザインを行います。
今回作るもの